RDP TLS Certificate Deployment Using GPO
Remote Desktop has been the Go To remote administration tool for many IT professionals and sadly many even expose it to the internet leading to brutefoce attacks and Man in the Middle attacks. I still remember the fist time I saw how easy it is from Irongeek examples using Cain & Able http://www.irongeek.com/i.php?page=videos/cain-rdp-terminal-server-mitm-sniff and http://www.irongeek.com/i.php?page=security/cain-rdp-mitm-parser I have taken great care to make sure RDP connections in my network and customer networks are as secure as possible. Here is an example on how to deploy TLS certificates for use of RDP via GPO and how to configure some none Microsoft systems.
We start by openting the Certificate Authority management console, Right-Clicking on Certificate Templates and selecting Manage

It will open a template management console. we will scroll down and select Computer template and Right-Click on it selecting Duplicate Template

In compatibility settings I like to choose as a minimum Windows 2008 R2 and Windows 7 so as to make sure my connection uses stronger encryption algorithms and ciphers. This will vary depending on your network if you are forced to keep end of life versions of Windows or not.

In the certificate property window for the new template we navigate to the General Tab and set a Display Name and Template Name. I recommend using the same and with no spaces. Had once a weird bug where on Windows 2008 it would enroll a new certificate again and again if a space was in the display name.

For RDP we need to make sure that the proper extensions are set so it will work on both Windows and other platforms for TLS. On the Extensions tab we click on Edit to modify the extensions for the certificate that will be issued.

We now select Client Authentication and click Remove. Many tutorial I see out there follow blindly the recommendations on others to also remove Server Authentication, this will break compatibility on none Windows platforms using the Microsoft Remote Desktop Client.

After removing the Client Authentication policy we now click on Add and in the window that appears we click on New to create a new policy specific for use of RDP TLS.

We provide the policy a name, in the example I give it a name of Remote Desktop Authentication and provide a Object Identifier of 1.3.6.1.4.1.311.54.1.2 this will identify the certificate as one that can be used to authenticate a RDP server.

Under the Security tab we need to identify those systems that can enroll using this template. Domain Computers is already present and with the Enroll permission but if you also plan to enable RDP on Domain Controllers add the Domain Controllers group and ensure the Enroll permission is selected.

If you have computers that are not able to enroll using the certificate template a quick way to identify it is a permission issue is to look in the Event Viewer and look under the System Windows Log for events with ID 1064 from the source TerminaServices-RemoteConnectionManager.

To make the certificate available for enrollment to the machines we go in to the Certificate Authority management console and select under the CA Certificate Template, right click and select New -> Certificate Template to Issue

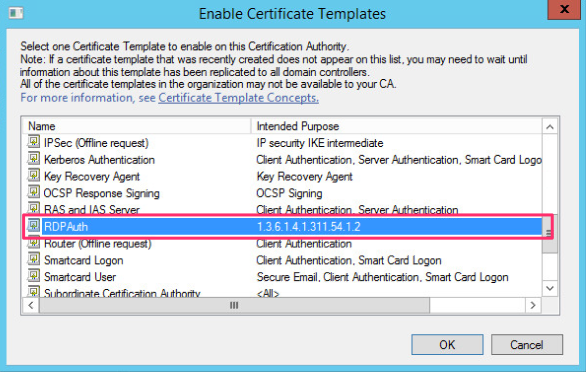
In the window Enable Certificate Templates select the certificate template you just created and click OK
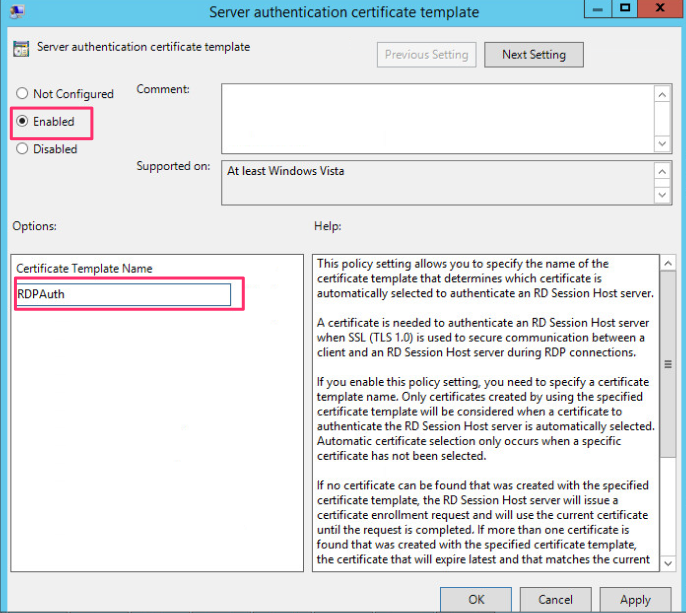
We now need to configure a Group Policy Object that will be linked to the Active Directory Container where the hosts we want to be able to request the certificate template. We start by creating or selecting an existing GPO and editing it. In the Group Policy Object Select Computer Configuration -> Policies -> Administrative Template -> Windows Components -> Remote Desktop Services -> Remote Desktop Session Host -> Security and select Server authentication certificate template.


On the setting we click on Enable and under Certificate Template Name we enter the name of the certificate template we made available for enrollment and click on OK.
To have the server use TLS 1.0 (I know TLS 1.0 is not the most secure) we select Require use of specific layer for remote (RDP) connection

We click on Enable and under Security Layer select from the dropdown SSL (TLS 1.0) and click on Ok

While under security settings I would also recommend enabling NLA since this and TLS will break most public RDP brute forcing tools. Select Require user authentication for remote connections by using Network Level Authentication and double click on it. On the properties screen select Enable and click on OK.
Also since we do not want users to simply accept and always trust connections since this defeats the purpose of all this settings we ensure that clients always validate the server certificate. We select Computer Configuration -> Policies -> Administrative Templates -> Windows Components -> Remote Desktop Settings -> Remote Desktop Connection Client We double click on Configure Authentication for Client. Select Enable and set the Option to Warn me if authentication fails
If Remote Desktop is not enabled on another GPO you will need to go in to Connections under Remote Desktop Session Host and enable Allow users to connect remotely by using Remote Desktop Service.

We now enable the firewall rules allowing RDP on the host (Believe it or not a lot of people actually miss this step.) We go to Computer Configuration -> Policies -> Windows Settings -> Security Settings -> Windows Firewall with Advanced Security -> Windows Firewall with Advanced Security -> Inbound Rules and right click on it and select New Rule


For sake of simplicity in this example we will use predefined rules but in real life you are better off creating a custom rule for TCP and UDP port 3389 and limiting it to a set of management hosts or to a subnet where management systems reside so as mitigate the risk of lateral movement in the case of a compromise.
We select Predefined and from the dropdown menu select Remote Desktop.

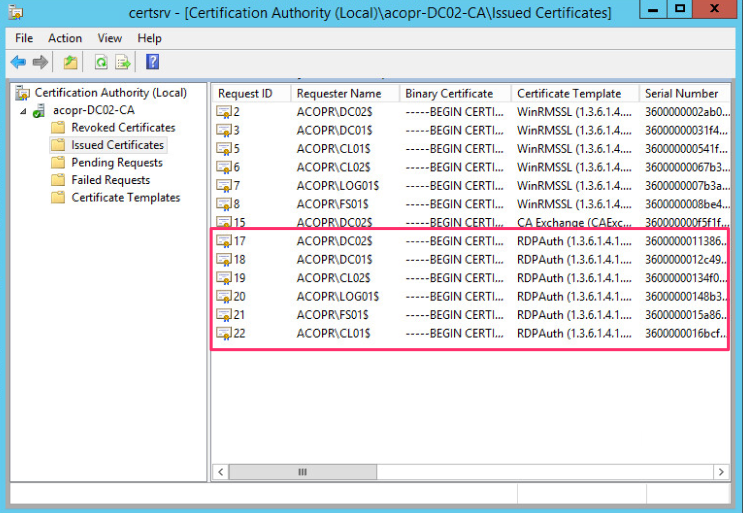
Once finished you can close the GPO and wait for the client computers to apply the policy or forcing an update as shown in this previous blog post http://www.darkoperator.com/blog/2015/3/9/updating-group-policy-objects-remotely To track what systems have enrolled and have the certificates deployed you can open the Certificate Authority management console and user Issued Certificates you will be able to see the certificates currently issued.
Another way to get a list of issued certificates is to use the PSPKI PowerShell module available in CodePlex at https://pspki.codeplex.com this allow us to export the data in to a CSV, XML, HTML or use it inside of scripts. To list all certificates that where issued and are valid for the RDPAuth Template we use the Get-IssuedRequest cmdlet and set a filter for the template name.
Get-CA | Get-IssuedRequest -Filter "CertificateTemplate -eq RDPAuth"
If you need to audit the actual settings for RDP locally or remotely the WMI class Win32_TSGeneralSetting comes in very handy. We can use PowerShell to get the data and the class information from MSDN to understand the values.
Get-WmiObject -class "Win32_TSGeneralSetting" -Namespace root\cimv2\terminalservices -Filter "TerminalName='RDP-tcp'"
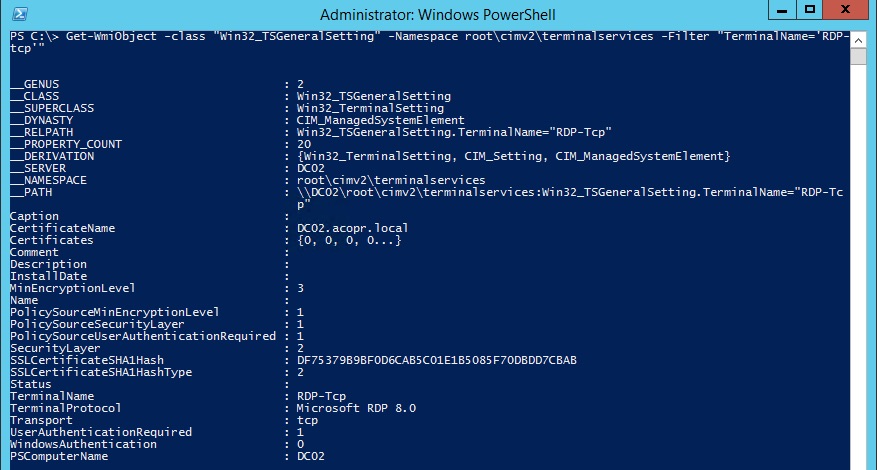
The values of most interest would be:
- SSLCertificateSHA1Hash - SHA1 Hash of the certificate (Same as certificate thumbprint).
- MinEncryptionLevel - Should be 3 (Encryption is set to High)
- SecurityLayer - Should be 3 (Enforces TLS preventing downgrade to RDP Security Layer)
Adding CA certificate to none Windows Devices and Hosts.
On mixed environments you will need to add the CA certificate so as to able to connect and validate the server. I will cover examples of those systems that Microsoft makes their Remote Desktop client available for.
OS X
On a Mac to add the certificate on the system store so as to be able to validate that your connection is not being intercepted. For this you will need to have the Certificate Enrollment Web Service role installed so you can use your browser to download the CA certificate using your web browser by navigating to https://<host name or IP/Certsrv provide your domain credentials and select the link Download a CA certificate, certificate chain or CRL

Select install CA certificate

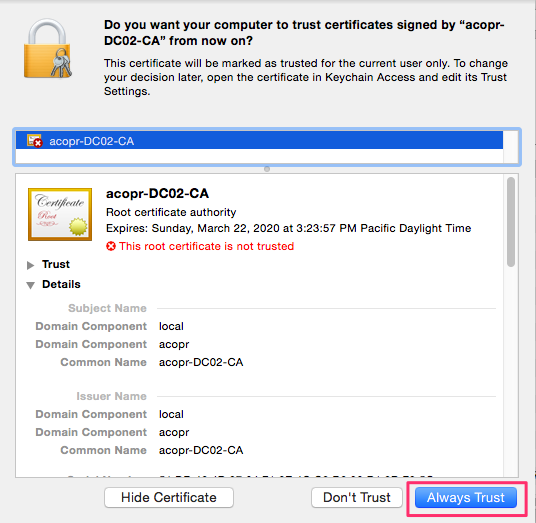
A window will appear asking you where do you want to add the certificate to your keychain. If you want it only for the current uses under keychain select login, if you want it to be available to all users select system and click Add

You will be asked if you want to trust or not the certificate. Click on Always Trust
When using the Remote Desktop Client make sure to use FQDN when specifying the PC name.

Android Lollipop
For this you will need to have the Certificate Enrollment Web Service role installed so you can use your browser to download the CA certificate using your web browser by navigating to https://<host name or IP/Certsrv provide your domain credentials and select the link Download a CA certificate, certificate chain or CRL

Select install CA certificate and a window will appear asking for a name for the certificate. Provide one and click on Ok

You will get a warning on the certificate. This is normal since it is a CA certificate only present for the user and not trusted by the system. You can use an application from the Google Play store to move the certificate in to the System store, the app is called Move Certs!

Just like on OS X you need to use a FQDN on the PC Name field.

iOS
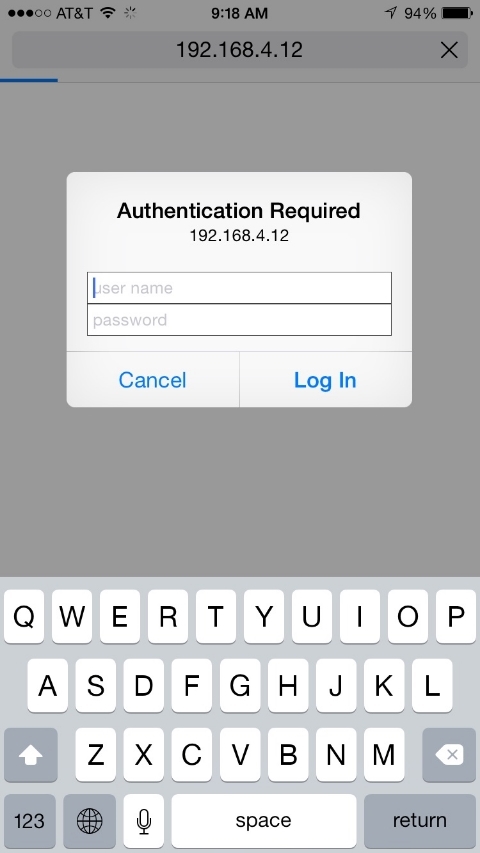
On iOS the process is similar to all other none Windows system where we navigate to the certificat enrollment web service and Authenticate.
When we download click on the CA download linl we will be moved to a screen where we will see the details of the certificate and we press Install

We will be asked for the passcode of the phone to make sure it is you the owner the one that wants to add the certificate.

It will provide a warning explaining the dangers of installing untrusted CA certificates on the device. Click on Install it will aks again and put the word Install in red so as to make sure it is something you want to do.


You will now see that the certificate is trusted and you can use the Microsft Remote Desktop Client app to connect to hosts with RDP enabled. Remember just like with previous examples you need to use FQDN for the *PC name *field
